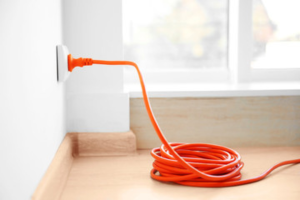
Cord
Is the week over yet? It’s been raining all week here in the GTA, and suddenly we may even get some snowfall; spring, where are you? Alright, but let’s move on from the weather and get down to business.
Mornings are hectic enough without the added frustration of malfunctioning appliances. Imagine relying on your coffee maker for that essential morning brew, only to find it’s decided to go on strike. Or perhaps your toaster, a steadfast companion of breakfast routines, suddenly refuses to toast. In appliance repair, these scenarios are not unfamiliar.
Today, we’re honing in on a particular aspect of appliance maintenance: the replacement of cords and plugs. Often underestimated, these components are the foundation of appliance functionality. Understanding the ins and outs of cord and plug replacement is crucial for ensuring the seamless operation of our household devices.
In this analytical exploration, we get deep into the technical intricacies of cord replacement. From deciphering the varying cord types to providing a systematic guide for replacement procedures, consider this your comprehensive resource for navigating appliance repair with precision.
So, without further ado, let’s roll up our sleeves and dive into the technical landscape of appliance maintenance. Rain or shine, there’s no time to waste when it comes to keeping our appliances in top-notch condition.
Understanding Appliance Cord Types
In appliance maintenance, the diversity of cord types plays a crucial role in ensuring safety and efficiency. Let’s break down the classifications:
- Heavy-Duty Cords for High-Heat Appliances: Appliances like irons, which generate significant heat, require cords built to withstand extreme temperatures. These heavy-duty cords feature robust construction and heat-resistant materials, essential for preventing fire hazards. Compliance with safety standards, such as the Underwriters Laboratory (UL) fire rating, is non-negotiable when selecting cords for high-heat appliances.
- Medium-Weight Cords for Moderate Applications: Frying pans and electric griddles, while not as heat-intensive as irons, still demand cords with durability. Medium-weight cords offer a balance between flexibility and resilience, capable of handling the moderate operating temperatures of these appliances. Ensuring proper gauge compatibility and fire resistance rating is critical for mitigating safety risks.
- Lightweight Cords for Low-Temperature Devices: Appliances like coffeepots, with minimal heat output, rely on lightweight cords. While less robust, these cords are suitable for devices operating at lower temperatures. However, adherence to safety standards remains essential to prevent potential hazards.
Understanding the distinctions between these cord types empowers users to make informed choices, promoting appliance longevity and safety.
Step-by-Step Guide to Cord Replacement
Replacing appliance cords requires meticulous attention to detail to ensure both safety and functionality. Let’s walk through the process step by step:
- Preparation: Before beginning the replacement process, gather the necessary tools, including pliers and a new plug. Additionally, ensure the appliance is unplugged and disconnected from any power source to avoid electrical hazards.
- Removing the Old Cord: Carefully cut off the old cord approximately 2 inches above the plug. This step helps prevent potential damage to the wiring caused by frequent insertion and removal of the plug from wall sockets.
- Preparing the New Plug: Disassemble the new plug by squeezing the two prongs together to remove them from the casing. Retain the plastic insulator for reassembly later.
- Attaching the New Cord: Thread the new cord through the plug casing, ensuring the wires are exposed and ready for attachment. If the prongs are on a single unit with crimp-style connectors, gently pull them apart to open the prongs.
- Connecting the Wires: Securely attach the wires of the new cord to the plug, ensuring proper polarity. Follow manufacturer guidelines or wiring diagrams to ensure correct connections. Take care to tighten any screws or terminals to prevent loose connections.
- Assembling the Plug: Once the wires are securely attached, slide the unit back into the plug casing. If the prongs were separated, squeeze them closed to secure the wires in place.
- Replacing the Plastic Insulator: Reattach the plastic insulator onto the prongs, ensuring a snug fit. This insulator helps secure the cord within the plug casing and prevents exposure to electrical components.
By following these systematic steps, users can effectively replace appliance cords with confidence, ensuring optimal safety and functionality. However, if uncertain or uncomfortable with the process, it’s advisable to seek professional assistance to avoid potential hazards.
Considerations and Alternatives
While replacing appliance cords can often be a straightforward process, certain considerations and alternatives merit attention:
- Pre-Attached Cord and Plug Option: In some cases, it may be more convenient to purchase a replacement cord with a pre-attached plug. This option eliminates the need for separate cord and plug assembly and may simplify the replacement process for users less familiar with wiring procedures.
- Timing of Cord Purchase: If opting for a separate cord and plug assembly, it’s prudent to acquire the replacement cord before removing the old one from the appliance. This ensures minimal downtime for the appliance and facilitates a seamless transition from old to new.
- Adherence to Manufacturer Guidelines: Always consult the appliance’s user manual or manufacturer guidelines when replacing cords and plugs. Manufacturers may provide specific recommendations or instructions tailored to their products, ensuring optimal safety and performance.
- Professional Assistance: For individuals uncomfortable with electrical work or uncertain about the replacement process, seeking professional assistance is advisable. Certified appliance repair technicians possess the expertise and tools necessary to safely and effectively replace cords and plugs, minimizing the risk of electrical hazards or damage to the appliance.
- Safety First: Regardless of the chosen approach, prioritizing safety throughout the replacement process is paramount. Ensure the appliance is unplugged and disconnected from any power source before beginning work. Additionally, exercise caution when handling electrical components and adhere to proper wiring practices to prevent accidents or injuries.
By considering these factors and alternatives, users can approach appliance cord replacement with confidence and make informed decisions that prioritize safety and functionality.
Conclusion
As we conclude our exploration into appliance cord replacement, it’s evident that addressing these components’ maintenance is crucial for ensuring the safety and efficiency of household appliances.
At ARS Appliances Repair Service, we’re committed to providing top-notch assistance with all your appliance repair needs. Whether you’re dealing with faulty cords, mechanical issues, or routine maintenance, our team of skilled technicians is here to help.
With our dedication to excellence and customer satisfaction, ARS Appliances Repair Service is your trusted partner in appliance repair across Southern Ontario and Ottawa. Let us take the hassle out of appliance maintenance, allowing you to enjoy seamless functionality and peace of mind.
Don’t let appliance issues disrupt your daily life. Contact ARS Appliances Repair Service today, and let us help you keep your appliances running smoothly for years to come.
