Appliance Maintenance

Appliance Maintenance

Appliance Maintenance is on the mind as the festive cheer begins to settle and the remnants of holiday celebrations are swept away, it’s time to turn our attention to the unsung heroes of our homes – our trusty appliances. At ARS Appliances Repair Service, nestled in the heart of Concord-Vaughan, Ontario, we understand the demands that seasonal festivities place on household appliances. The joyous chaos of gatherings, elaborate feasts, and extended usage can take a toll on these workhorses.

In this exclusive Boxing Day blog, we embark on a journey of post-holiday appliance care, delving into DIY fixes and preventive measures to ensure your appliances continue to serve you seamlessly. As we unwrap the intricacies of maintenance, we aim to empower you with practical insights beyond the festivities, helping you keep your home running smoothly throughout the year.

So, join us as we unwrap the secrets to preserving the life and efficiency of your appliances, turning the post-holiday season into an opportunity for rejuvenation and care. Let’s dive into the world of appliance maintenance and embark on a journey to keep the heart of your home in top-notch condition.

Common Post-Holiday Appliance Maintenance: Navigating Wear and Tear

As the last strains of holiday music fade away and the decorations return to storage, it’s not uncommon to discover that our appliances have undergone a marathon of use during the festivities. The increased load, whether from cooking extravagant meals or accommodating guests, can leave a trace of wear and tear on our reliable companions.

A. Increased Usage During Celebrations

The holiday season often translates into a surge in appliance usage. From the oven working overtime to prepare festive feasts to the washing machine handling an influx of holiday-themed linens, our appliances bear the brunt of our celebratory traditions. This heightened activity can lead to issues such as decreased efficiency, unusual noises, or even malfunctions.

B. Potential Wear and Tear

Beyond the immediate post-holiday hustle, the wear and tear inflicted during this period can have lasting effects. The wear on components, the strain on motors, and the accumulation of residues may not be immediately apparent, but they can silently compromise the longevity of your appliances. Recognizing these issues early on is key to maintaining the overall health of your home devices.

In the next section, we’ll explore practical DIY fixes for common post-holiday appliance problems, providing you with the tools to address issues promptly and efficiently. After all, a proactive approach to appliance care can save you both time and money in the long run. Stay tuned for expert insights and step-by-step guides to keep your appliances running like clockwork.

DIY Fixes for Common Problems: Empowering You to Tackle Post-Holiday Appliance Maintenance

Now that we’ve identified the common post-holiday issues, let’s roll up our sleeves and explore some hands-on, do-it-yourself fixes. Armed with some know-how, you can address these problems promptly and restore your appliances to their optimal state without needing immediate professional assistance.

A. Quick Troubleshooting Tips for Common Issues

  1. Refrigerator Repair: Combatting uneven cooling or strange noises.
  2. Oven Repair: Resolving temperature inconsistencies or faulty heating elements.
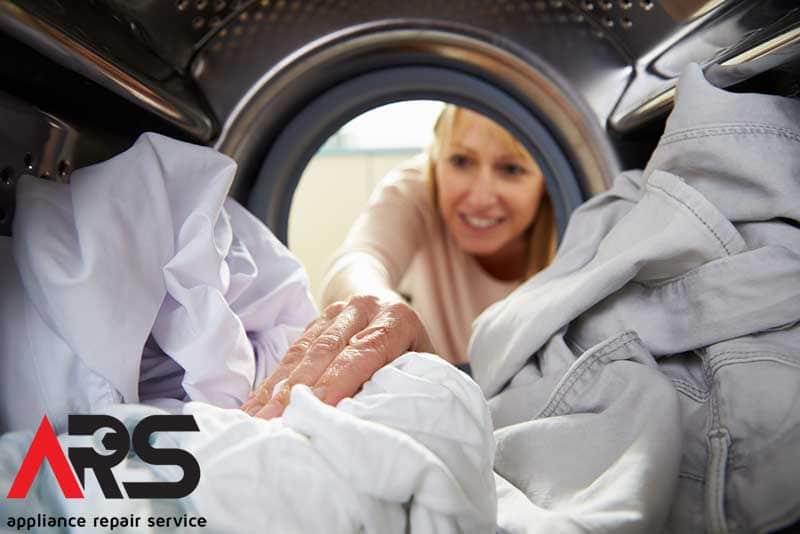
  3. Washing Machine Repair: Tackling drainage problems or sudden leaks.
  4. Dishwasher Repair: Dealing with poor cleaning performance or water not draining properly.

B. Step-by-step guides for Simple Repairs

  1. Unclogging the Drain: A simple guide to reviving a slow-draining sink or dishwasher.
  2. Calibrating Your Oven: Ensuring accurate temperature settings for perfect baking results.
  3. Cleaning Refrigerator Coils: A step-by-step process to enhance your fridge’s cooling efficiency.
  4. Replacing Washer Seals: DIY tips for addressing leaks in your washing machine.

Our step-by-step guides are designed to make appliance troubleshooting accessible, even for those with limited technical expertise. Remember, an ounce of DIY prevention can often save you a pound of repair costs down the line. Join us in the next section as we delve into proactive measures with preventive care tips, ensuring your appliances remain in peak condition long after the holiday festivities have subsided.

When it comes to common appliance issues, a bit of troubleshooting can go a long way in resolving problems without the need for immediate professional intervention. Here are quick troubleshooting tips for prevalent issues in some of your essential home appliances.

Refrigerator Repair: Combatting Uneven Cooling or Strange Noises

Symptoms:

  • Uneven cooling, with some areas too cold or too warm.
  • Unusual noises such as rattling, buzzing, or clicking.

Quick Troubleshooting Tips:

  1. Check Temperature Settings: Ensure the thermostat is set to the recommended temperature. Adjust if necessary.
  2. Clean Condenser Coils: Follow our earlier guide on cleaning refrigerator coils to enhance cooling efficiency.
  3. Inspect for Food Blockage: Ensure food items are not blocking vents or interfering with the proper closing of doors.
  4. Level the Refrigerator: Use a level to check if your refrigerator is sitting evenly on the floor, as uneven placement can impact cooling.

Oven Repair: Resolving Temperature Inconsistencies or Faulty Heating Elements

Symptoms:

  • Baking results are uneven or take longer than usual.
  • Visible damage to heating elements.

Quick Troubleshooting Tips:

  1. Calibrate the Oven: Follow our guide on calibrating your oven to ensure accurate temperature settings.
  2. Inspect Heating Elements: Check for visible signs of damage or malfunction. Replace if necessary.
  3. Check Door Seal: Ensure the oven door seal is intact. A damaged seal can lead to heat loss and uneven baking.

Washing Machine Repair: Tackling Drainage Problems or Sudden Leaks

Symptoms:

  • Slow or blocked drainage.
  • Water leaks during or after a wash cycle.

Quick Troubleshooting Tips:

  1. Unclog the Drain: Refer to our DIY guide on unclogging drains for both sinks and dishwashers.
  2. Inspect Hoses: Check for kinks or blockages in the hoses. Replace damaged hoses.
  3. Examine Pump Filter: Clean the pump filter, usually located at the front or bottom of the washing machine, to remove debris.

Dishwasher Repair: Dealing with Poor Cleaning Performance or Water Not Draining Properly

Symptoms:

  • Dishes are not cleaned thoroughly.
  • Standing water at the bottom of the dishwasher.

Quick Troubleshooting Tips:

  1. Clean Sprayer Arms: Remove and clean sprayer arms to ensure proper water circulation.
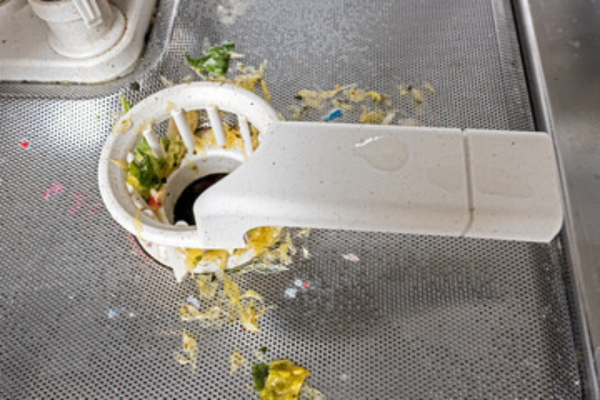
  2. Check for Debris: Inspect the dishwasher’s bottom for any food particles or debris. Clean if necessary.
  3. Unclog the Drain: Follow the steps in our DIY guide to address drainage issues.

These quick troubleshooting tips are designed to help you address common issues with your refrigerator, oven, washing machine, and dishwasher. If problems persist or if you’re uncertain about the solutions, don’t hesitate to contact professionals like ARS Appliances Repair Service for a thorough inspection and expert assistance. Stay tuned for more DIY guides and preventive care tips in our post-holiday appliance maintenance series.
Unclogging the Drain: A Simple Guide to Reviving a Slow-Draining Sink or Dishwasher

A slow-draining sink or dishwasher can quickly become a frustrating inconvenience, especially after the holiday hustle. The accumulation of food particles, grease, and debris can lead to clogs, causing water to pool and drainage to slow. But fear not, as we present a straightforward guide to help you tackle this common issue without the need for professional intervention.

Materials Needed:

  1. Plunger
  2. Baking soda
  3. Vinegar
  4. Boiling water
  5. Rubber gloves
  6. Bucket or towels

Step 1: Assess the Situation

Before diving into action, identify whether the slow drainage is specific to the sink or if it extends to the dishwasher. If both are affected, it’s likely a shared drainage issue.

Step 2: Remove Excess Water

If there’s standing water in the sink, use a bucket or towels to remove as much water as possible. For dishwashers, check for visible debris in the bottom and remove it manually.

Step 3: Plunge Away

For sinks, use a plunger to create a strong seal over the drain. Plunge vigorously for about a minute, aiming for a smooth, consistent motion. For dishwashers, skip this step and proceed to the next.

Step 4: Baking Soda Boost

For sinks, sprinkle about 1/2 cup of baking soda down the drain. Follow this with a cup of vinegar. The fizzing reaction helps break down debris. Let it sit for 15 minutes. For dishwashers, add baking soda to the bottom of the machine.

Step 5: Hot Water Flush

Boil a kettle of water. Carefully pour the boiling water down the drain to flush away the loosened debris. For dishwashers, skip this step.

Step 6: Test the Drainage

Turn on the tap or run a short dishwasher cycle to check if the drainage has improved. If it’s still slow, consider repeating the process or seeking professional assistance.

Preventive Tips:

  • Regular Maintenance: Implement this DIY unclogging routine every few months, even if you haven’t noticed any issues, to prevent build-up.
  • Mesh Screens: Install mesh screens over sink drains to catch debris before it goes down.

By following these simple steps, you can often rejuvenate your sink or dishwasher, restoring efficient drainage and preventing potential water damage. If problems persist, it may be indicative of a more complex issue, and it’s advisable to reach out to professionals like ARS Appliances Repair Service for a thorough inspection and resolution. Stay tuned for more DIY guides and preventive care tips in our post-holiday appliance maintenance series.

Calibrating Your Oven: Ensuring Accurate Temperature Settings for Perfect Baking Results

There’s nothing more disheartening than expecting golden-brown perfection from your oven, only to find unevenly baked goods. If you suspect that your oven’s temperature settings might be a little off-kilter, fear not. With a bit of guidance, you can calibrate your oven to ensure it’s delivering the precise temperatures needed for culinary success.

Materials Needed:

  1. Oven thermometer
  2. Screwdriver
  3. User manual (optional)

Step 1: Preheat and Monitor

Start by preheating your oven to a specific temperature, say 350°F. Place an oven thermometer on the center rack and wait for the oven to reach the desired temperature. Once preheated, check the thermometer reading.

Step 2: Compare Readings

Compare the thermometer reading with the oven’s display. If there’s a discrepancy, note the difference. For example, if the oven thermometer reads 375°F when set to 350°F, there’s a 25-degree variance.

Step 3: Access the Calibration Settings

Refer to your oven’s user manual to determine if it has built-in calibration settings. Some ovens allow you to adjust the temperature settings within a certain range.

Step 4: Adjust the Temperature Offset

Using a screwdriver, access the calibration controls. These are often located on the back of the temperature control knob or inside the control panel. Adjust the calibration settings to match the variance you noted earlier. In the example, you’d increase the calibration by 25 degrees.

Step 5: Retest

Preheat the oven again to the same temperature and recheck with the oven thermometer. Repeat the process until the oven’s display matches the thermometer reading accurately.

Step 6: Fine-Tuning

If your oven lacks built-in calibration settings, you can still achieve accuracy by mentally adjusting your temperature settings. For example, if you know your oven runs 25 degrees hot, set it 25 degrees lower than the desired temperature.

Preventive Tips:

  • Regular Calibration Checks: Periodically verify your oven’s accuracy, especially if you notice inconsistent baking results.
  • Use an Oven Thermometer: Invest in a reliable oven thermometer for consistent and accurate temperature monitoring.

By taking these steps to calibrate your oven, you ensure that your culinary creations are cooked to perfection. If you encounter persistent issues or have difficulty calibrating, consider reaching out to professionals like ARS Appliances Repair Service for a thorough inspection and precise adjustments. Stay tuned for more DIY guides and preventive care tips in our post-holiday appliance maintenance series.

Cleaning Refrigerator Coils: A Step-by-Step Process to Enhance Your Fridge’s Cooling Efficiency

Your refrigerator works tirelessly to keep your food fresh, but over time, dust and debris can accumulate on its coils, hindering its cooling efficiency. If you’ve noticed a decline in your fridge’s performance, it might be time to give those coils a thorough cleaning. Follow this step-by-step guide to ensure your refrigerator runs at its optimal capacity.

Materials Needed:

  1. **Phillips-head screwdriver
  2. **Vacuum cleaner with a brush attachment
  3. **Condenser coil brush or a long, narrow brush
  4. **Damp cloth or sponge
  5. **Unplug your refrigerator

Step 1: Safety First

Before beginning, unplug your refrigerator to ensure your safety during the cleaning process. This also prevents any electrical mishaps while you’re working on the coils.

Step 2: Locate the Coils

Refer to your refrigerator’s user manual to identify the location of the condenser coils. Typically, they are located either on the back of the fridge or beneath the unit, behind the front grille.

Step 3: Remove the Front Grille (if applicable)

If the coils are behind the front grille, use a screwdriver to remove them. This will provide easier access to the coils.

Step 4: Brush Away Surface Debris

With a condenser coil brush or a long, narrow brush, gently dislodge and remove surface debris from the coils. Be thorough, reaching into crevices and corners to ensure a comprehensive cleaning.

Step 5: Vacuuming the Coils

Using a vacuum cleaner with a brush attachment, carefully vacuum the coils to remove loosened dirt and dust. Ensure you reach into tight spaces to eliminate all debris.

Step 6: Clean the Grille and Surrounding Areas

If you removed the front grille, clean it thoroughly. Wipe down the surrounding areas with a damp cloth or sponge to remove any residual dust.

Step 7: Plug In and Test

After completing the cleaning process, plug your refrigerator back in. Allow it to run for a while and feel the temperature inside. You should notice an improvement in cooling efficiency.

Preventive Tips:

  • Regular Maintenance Schedule: Make cleaning your refrigerator coils a part of your regular maintenance routine. Aim to do it at least once or twice a year.
  • Keep the Area Around the Fridge Clean: Ensure there’s ample space around the refrigerator for proper ventilation, preventing the accumulation of dust.

By investing a little time in cleaning your refrigerator coils, you contribute to the longevity and efficiency of your appliance. If you continue to experience cooling issues or if the coils are difficult to access, consider seeking professional assistance from experts like ARS Appliances Repair Service. Stay tuned for more DIY guides and preventive care tips in our post-holiday appliance maintenance series.

Replacing Washer Seals: DIY Tips for Addressing Leaks in Your Washing Machine

A leaking washing machine can lead to a host of issues, from water damage to potential appliance malfunction. One common culprit for leaks is a worn or damaged washer seal. Tackling this issue promptly can save you from further complications. Follow this step-by-step guide for replacing washer seals in your washing machine, empowering you to address leaks and keep your laundry room dry.

Materials Needed:

  1. Replacement washer seal compatible with your washing machine model
  2. Screwdriver
  3. Adjustable wrench
  4. Towels or rags
  5. Bucket or shallow pan

Step 1: Unplug the Washing Machine

Before starting any repair work, ensure the safety of the process by unplugging your washing machine from the power source.

Step 2: Identify the Washer Seal

Locate the rubber gasket or door seal around the opening of the washing machine. This is the component that prevents water from leaking out during the wash cycle.

Step 3: Inspect and Identify the Issue

Examine the seal for visible signs of wear, tear, or damage. If you notice cracks, holes, or areas where the seal has pulled away from the drum or door, it likely needs replacement.

Step 4: Remove the Front Panel

Using a screwdriver, carefully remove the screws securing the front panel of the washing machine. This step may vary depending on your machine model, so refer to your user manual for specific instructions.

Step 5: Access the Washer Seal

Once the front panel is removed, you should have clear access to the washer seal. Take note of its positioning and how it’s attached to the drum and door.

Step 6: Remove the Old Washer Seal

Loosen any clamps or fasteners holding the seal in place. Carefully peel the old seal away from the drum and door. Be cautious not to damage any surrounding components during this process.

Step 7: Install the New Washer Seal

Align the new washer seal in the same position as the old one. Secure it with the appropriate clamps or fasteners. Ensure a tight, secure fit to prevent future leaks.

Step 8: Reassemble the Front Panel

Reattach the front panel of the washing machine using the screws you removed earlier. Make sure it’s securely in place.

Step 9: Test for Leaks

Plug in the washing machine and run a short cycle to check for leaks. Keep an eye on the washer seal area to ensure proper functioning.

Preventive Tips:

  • Regular Inspection: Periodically inspect the washer seal for signs of wear and tear to address issues before they escalate.
  • Avoid Overloading: Overloading the washing machine can put a strain on the seals, contributing to premature wear.

By following these DIY tips for replacing washer seals, you can effectively address leaks in your washing machine and prevent water damage in your laundry area. If you encounter challenges during the process or if leaks persist, consider reaching out to professionals like ARS Appliances Repair Service for expert assistance. Stay tuned for more DIY guides and preventive care tips in our post-holiday appliance maintenance series.

Conclusion: Nurturing Your Home’s Lifelines for Appliance Maintenance Longevity

As we wrap up our post-holiday appliance maintenance guide, it’s clear that our home appliances are the unsung heroes, working tirelessly to make our lives easier. With a little proactive care and the right DIY knowledge, you can ensure these vital components of your household continue to function at their best.

From troubleshooting common issues to delving into DIY fixes and preventive measures, our goal has been to empower you to take charge of your appliance maintenance. However, we also recognize that there are times when professional intervention is crucial. Whether it’s calibrating your oven, unclogging a drain, cleaning refrigerator coils, or replacing washer seals, these efforts contribute to the overall health and efficiency of your appliances.

At ARS Appliances Repair Service, we understand the importance of a smoothly running home, especially after the holiday festivities. Our team of experts is here to offer thorough inspections, precise repairs, and valuable insights to keep your appliances in top-notch condition. As you embark on the journey of post-holiday care, remember that a well-maintained home is a haven of comfort and convenience.

So, let’s usher in the new year with appliances that not only survive but thrive. Take the time to implement these tips, schedule professional maintenance when needed, and enjoy the peace of mind that comes with a home where everything just works.

Here’s to a year filled with hassle-free appliances and a home that continues to be the heart of your cherished memories. Happy appliance care, and may your household flourish in the days to come! Contact us for any repair that exceeds the DIY parameters.