Oven Door Seal
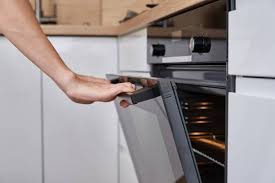
It’s a beautiful Monday in Toronto, and the sunny skies have been a pleasant backdrop to our bustling city. However, amidst this lovely weather, you might face an unwelcome challenge in your kitchen: a broken oven door seal. This small issue can lead to a range of problems, from inefficient cooking and higher energy bills to potential safety hazards.
At ARS Appliances Repair Service, located at 15 Connie Crescent in Concord-Vaughan, we understand the importance of a well-functioning kitchen. As Ontario’s premier appliance repair company, we’ve helped countless households across southern Ontario and the GTA keep their appliances in shape. Today, we’re here to guide you through a temporary fix for your oven door seal. Whether you’re waiting for a permanent repair or need a quick solution to keep your oven operational, this step-by-step guide will help you restore the efficiency and safety of your oven.
What Tools and Materials Do You Need to Fix an Oven Door Seal?
Before you start the repair process, it’s essential to gather all the necessary tools and materials. Having everything ready will make the job smoother and quicker. Here’s a list of what you’ll need to temporarily fix the seal on your oven door:
Essential Tools and Materials:
- High-Temperature Silicone Sealant: This is crucial as it can withstand the high temperatures inside your oven. Regular sealant won’t do the job.
- Sealant Gun: A tool to apply the silicone sealant evenly.
- Screwdrivers: Depending on your oven model, you might need a Phillips or flathead screwdriver to remove and replace screws.
- Clamps or Bricks: These will help hold the door in place while the sealant sets. If you can remove the whole door, clamps will be useful; otherwise, a brick can suffice.
- General Cleaning Supplies: Including washing up liquid, scrubbing sponges, and cloths to clean the area before applying the new sealant.
Optional Tools:
- Glass Scraper: Handy for removing baked-on grease or any residual sealant on the glass.
By preparing these tools and materials in advance, you’ll ensure a smooth and efficient repair process. Now that you have everything you need, let’s move on to the next step: safely removing the old sealant.
How Do You Safely Remove the Old Sealant from an Oven Door?
Removing the old sealant is a crucial step in ensuring that the new sealant adheres properly and creates an effective seal. Follow these detailed steps to safely and efficiently remove the old sealant from your oven door.
Step-by-Step Guide to Removing Old Sealant
Step 1: Locate and Remove Screws
First, you need to locate all the screws that hold your oven door together. This often requires removing the bottom oven tray drawer to access the screws. Be prepared to get down on your knees and use your screwdriver to remove them. Typically, there are screws near the hinges and along the sides of the door. Once the screws are removed, carefully take off the front and inner parts of the door, which might include glass panels. Handle these pieces with caution to avoid breaking the glass.
Step 2: Remove the Old Sealant
Once you have the door disassembled, it’s time to remove the old sealant. Using a flathead screwdriver, carefully pry off the old sealant. Apply gentle pressure to get the screwdriver under the sealant and peel it away. If a screwdriver isn’t suitable, you can also use a craft knife. Be cautious to avoid any injuries, as both tools require a steady hand.
Step 3: Clean the Area Thoroughly
After removing the bulk of the old sealant, use a scrubbing sponge and some washing up liquid to clean the remaining residue. This step ensures that the new sealant will adhere properly. Don’t worry about minor scratches from the screwdriver or knife; these will provide a better grip for the new sealant.
By following these steps, you’ll prepare the surface for a new application, ensuring it adheres properly and forms a solid seal. In the next section, we’ll cover how to clean the glass and oven door surface before applying the new sealant.
How Should You Clean the Glass and Oven Door Surface?
Cleaning the glass and the oven door surface thoroughly is essential before applying new sealant. Any remaining grease, dirt, or old sealant can prevent the new seal from adhering properly, leading to an ineffective repair. Follow these steps to ensure a clean and prepared surface.
Step-by-Step Guide to Cleaning the Glass and Oven Door Surface
Step 1: Remove Stubborn Residue
If the glass or oven door has old, baked-on grease or remnants of sealant, use a glass scraper. This tool, which is essentially a razor blade on a handle, can effectively remove tough residues. Hold the scraper at a low angle and gently scrape away the grime. Be careful not to scratch the glass.
Step 2: Clean with Soap and Water
Once you’ve removed the bulk of the residue, fill a sink with warm water and a few drops of washing up liquid. Submerge a scrubbing sponge in the soapy water and scrub the glass and oven door surfaces thoroughly. Pay extra attention to the areas where the old sealant was applied. If possible, do this over a sink lined with a soft cloth to prevent chipping the glass.
Step 3: Rinse and Dry
After scrubbing, rinse the surfaces with clean water to remove any soap residue. Dry the surfaces completely with a clean cloth. Moisture can interfere with the new sealant, so ensure that everything is thoroughly dry before proceeding.
Step 4: Final Inspection
Before moving on, inspect the surfaces to ensure they are clean and free of any remaining debris. A clean, smooth surface will help the new sealant adhere better and form a stronger bond.
With the glass and oven door surfaces clean and prepared, you’re now ready to apply the new high-temperature silicone sealant. In the next section, we’ll walk you through the steps to apply the sealant properly.
How Do You Apply New High-Temperature Silicone Sealant?
Applying the new high-temperature silicone sealant correctly is crucial to ensure a secure and long-lasting seal on your oven door. Follow these detailed steps to apply the sealant effectively.
Step-by-Step Guide to Applying New Sealant
Step 1: Prepare the Sealant Gun
Start by preparing the sealant gun. Cut off the tip of the silicone sealant tube at a 45-degree angle using a sharp knife. This will create a small opening, allowing for precise application. Insert the tube into the sealant gun by pressing the metal catch at the back and sliding the tube into place. Release the catch to secure the tube.
Step 2: Practice Applying Sealant
Before you begin applying the sealant to your oven door, it’s a good idea to practice on a piece of cardboard or scrap material. This will help you get a feel for the pressure needed to apply an even bead of sealant.
Step 3: Apply the Sealant to the Oven Door
Start by applying the sealant to the groove or edge where the glass and oven door meet. Hold the sealant gun at a 45-degree angle and apply steady pressure to create a continuous bead of sealant. Move the gun slowly and steadily to ensure an even application. Make sure the bead is thick enough to form a solid seal once the glass is in place.
Step 4: Position the Glass
Carefully position the cleaned glass back onto the oven door, aligning it with the sealant bead. Press gently to ensure the glass is seated firmly in the sealant. If you’re working on a flat surface, you can place a brick or similar weight on the glass to hold it in place. If the door is still attached to the oven, use clamps to secure the glass while the sealant sets.
Step 5: Apply Additional Sealant (Optional)
For extra security, you can apply an additional bead of sealant around the edge of the glass once it’s in place. This ensures a complete seal and adds an extra layer of protection against leaks.
Step 6: Let the Sealant Cure
Allow the sealant to cure for at least 24 hours before using the oven. This curing time is essential to ensure the sealant sets properly and forms a strong bond. Avoid moving or disturbing the oven door during this time.
By following these steps, you can ensure that the new sealant is applied correctly and will provide an effective seal for your oven door. In the next section, we’ll discuss how to reassemble the oven door after the sealant has cured.
How Do You Reassemble the Oven Door After Applying Sealant?
Once the new sealant has had time to cure, it’s time to reassemble your oven door. This process involves carefully putting all the parts back together and ensuring everything is securely in place. Follow these steps to reassemble your oven door effectively.
Step-by-Step Guide to Reassembling the Oven Door
Step 1: Check the Sealant
Before you begin reassembling the oven door, inspect the sealant to ensure it has cured properly. It should be firm to the touch and securely holding the glass in place. If it feels tacky or loose, give it more time to set.
Step 2: Align the Door Parts
Begin by aligning the glass and any other parts of the oven door that were removed. Carefully position the inner and outer panels, ensuring that all parts fit together snugly.
Step 3: Secure the Screws
With the door parts aligned, start replacing the screws that you removed earlier. Begin with the screws at the hinges, as these are critical for the door’s stability. Use your screwdriver to tighten each screw securely, but be careful not to overtighten and strip the screw holes.
Step 4: Reattach Any Additional Components
If your oven door has additional components, such as handles or decorative panels, reattach these now. Ensure that all screws and fasteners are securely tightened to prevent any loose parts.
Step 5: Test the Door
Once everything is reassembled, it’s time to test the door. Open and close it several times to ensure it moves smoothly and that the seal is tight. Check for any gaps or misalignments that could affect the door’s performance.
Step 6: Inspect for Final Adjustments
Finally, give the door one last inspection. Make sure all screws are tight, the sealant is fully set, and the door is aligned correctly. If everything looks good, your oven door should now be properly sealed and ready for use.
Reassembling the oven door carefully ensures that your temporary seal fix is effective and durable. In the next section, we’ll discuss how to test the new seal to ensure it’s working correctly.
How Can You Test the New Seal on Your Oven Door?
After reassembling your oven door, it’s essential to test the new seal to ensure it’s working correctly. A proper seal will improve your oven’s efficiency and safety. Follow these steps to test the effectiveness of the new seal.
Step-by-Step Guide to Testing the New Seal
Step 1: Inspect the Seal Visually
Start by visually inspecting the seal. Look for any gaps or areas where the sealant might not have adhered properly. The seal should be uniform and without any visible gaps or breaks.
Step 2: Perform a Door Test
Open and close the oven door several times to ensure it moves smoothly and aligns properly with the oven frame. The door should close snugly without any resistance. If the door does not close properly or feels loose, you may need to recheck the alignment and the seal.
Step 3: Use the Paper Test
A simple and effective way to test the seal is to use a piece of paper. Close the oven door with a sheet of paper placed between the door and the oven frame. Try to pull the paper out. If the paper slides out easily, the seal is not tight enough. Repeat this test at various points around the door to ensure the seal is consistent.
Step 4: Heat Test
Turn on your oven to a moderate temperature, around 350°F (175°C), and let it heat up for about 10-15 minutes. Carefully feel around the door edges for any warm air escaping. A proper seal should prevent any noticeable hot air from leaking out. If you detect any warm air, inspect the sealant again and apply additional sealant if necessary.
Step 5: Monitor Oven Performance
After completing the initial tests, monitor your oven’s performance over the next few uses. Pay attention to how quickly it heats up and maintains temperature. An effective seal should improve your oven’s efficiency and performance.
By conducting these tests, you can ensure that your temporary fix is effective and that your oven door seal is functioning properly. If you encounter any issues, you may need to reapply the sealant or consider a more permanent repair solution.
What Are Common Issues with Oven Door Seals and How to Avoid Them?
Even with careful application and testing, there are common issues that can arise with oven door seals. Understanding these issues and knowing how to avoid them can help ensure your oven remains in optimal working condition.
Common Issues with Oven Door Seals
Issue 1: Sealant Not Adhering Properly
One of the most common problems is the sealant not adhering properly to the glass or the oven door frame. This can happen if the surfaces weren’t cleaned thoroughly before application or if the sealant was applied unevenly.
How to Avoid: Ensure both the glass and the door frame are completely clean and dry before applying the sealant. Apply the sealant in a smooth, even bead and press the glass firmly into place.
Issue 2: Gaps in the Sealant
Gaps or bubbles in the sealant can compromise the effectiveness of the seal, allowing heat to escape and reducing oven efficiency.
How to Avoid: Apply the sealant carefully and slowly to avoid creating gaps or bubbles. If you notice any gaps after applying, smooth them out with a gloved finger or a tool before the sealant sets.
Issue 3: Sealant Deterioration
Over time, even high-temperature silicone sealant can deteriorate due to constant exposure to heat. This can lead to the seal breaking down and becoming ineffective.
How to Avoid: Regularly inspect the seal on your oven door. If you notice any signs of deterioration, such as cracking or peeling, it may be time to reapply the sealant or consider a permanent repair.
Issue 4: Misalignment of the Door
If the oven door is not aligned properly when reassembled, it can lead to an uneven seal and reduced efficiency.
How to Avoid: Carefully align the door parts during reassembly and test the door to ensure it closes properly. Adjust the alignment if necessary before the sealant sets completely.
Issue 5: Using Incorrect Sealant
Using a sealant that is not designed for high temperatures can result in the sealant melting or breaking down when the oven is in use.
How to Avoid: Always use a high-temperature silicone sealant specifically designed for oven use. Regular sealants cannot withstand the high temperatures inside an oven and will fail quickly.
By being aware of these common issues and taking steps to avoid them, you can ensure a more effective and long-lasting repair for your oven door seal.
What Are the Key Takeaways for Fixing Your Oven Door Seal?
Fixing the seal on your oven door may seem daunting, but with the right tools and a bit of patience, you can achieve a successful temporary repair. Here’s a quick recap of the essential steps and tips to keep your oven in top shape.
Quick Recap of the Steps
- Gather Tools and Materials: Ensure you have high-temperature silicone sealant, a sealant gun, screwdrivers, clamps or bricks, and cleaning supplies ready.
- Remove the Old Sealant: Carefully disassemble the oven door and remove any old sealant to prepare for a fresh application.
- Clean Thoroughly: Clean the glass and oven door surfaces to eliminate grease and residue, ensuring a proper bond for the new sealant.
- Apply New Sealant: Use the sealant gun to apply a thick, even bead of high-temperature silicone sealant around the edges of the glass.
- Reassemble the Oven Door: Carefully reassemble the door, securing all screws and ensuring proper alignment.
- Test the Seal: Perform visual inspections, door tests, and heat tests to confirm the effectiveness of the new seal.
Important Tips for Success
- Choose the Right Sealant: Always opt for high-temperature silicone sealant specifically designed for oven use to ensure durability.
- Regular Maintenance: Regularly inspect your oven door seal and address any signs of wear or damage promptly to prevent further issues.
- Monitor Performance: Keep an eye on your oven’s performance after the repair to ensure it’s operating efficiently.
By following these steps and tips, you can maintain your oven’s efficiency and safety while enjoying the beauty of home cooking. If issues persist or you need further assistance, don’t hesitate to reach out to a professional appliance repair service for expert help.
At ARS Appliances Repair Service, we’re here to assist you with any appliance challenges you may face. Enjoy your cooking, and keep your kitchen running smoothly!

ARS Appliance Repair Service has been trusted across Toronto, Ottawa, and Southern Ontario for over a decade. Our licensed, manufacturer-authorized technicians specialize in repairing all major household and commercial appliances with genuine parts and warranty-backed service. From refrigerators and washers to ovens, dishwashers, and more, we restore appliances quickly, professionally, and correctly the first time, earning the confidence of homeowners and businesses throughout the region.


